The 11th Company 40K Podcast

Welcome to the 11th Company BLOG. The 11th Company is a Warhammer 40K podcast dedicated to players, strategies, and tactics.

You can download our episodes at the website, from ITunes, several podcast sites, or connect directly to the RSS Feed. We try to release a new Episode every Monday Night. Check it out!

Forums: http://the11thcompany.freeforums.org

PODCAST WEBSITE: http://www.tangtwo.com/11thcompany

PODCAST RSS FEED: http://www.tangtwo.com/11thcompany/podcasts/the11thcompany.xml

Podcast Archive: http://the11thcompany.libsyn.com/webpage


Search This Blog

Thursday, March 27, 2014

Lost Necron Display Board

Lately I have been getting a lot of email regarding the lost Necron display board we spoke about on the podcast. Those of you who live in the Philadelphia area can visit it at Stomping Grounds hobby store in Warminister. Or you can check my post for this week.

Using MS Publisher, I created a template for a giant annihilation barge like structure
Cut out the template and position for size
I use the template twice. First to cut the lower section, then I cut all the top sections. The key was labeling all of these so I remember where they all fit afterward
All the pieces are now in place, thanks to some clever spacers
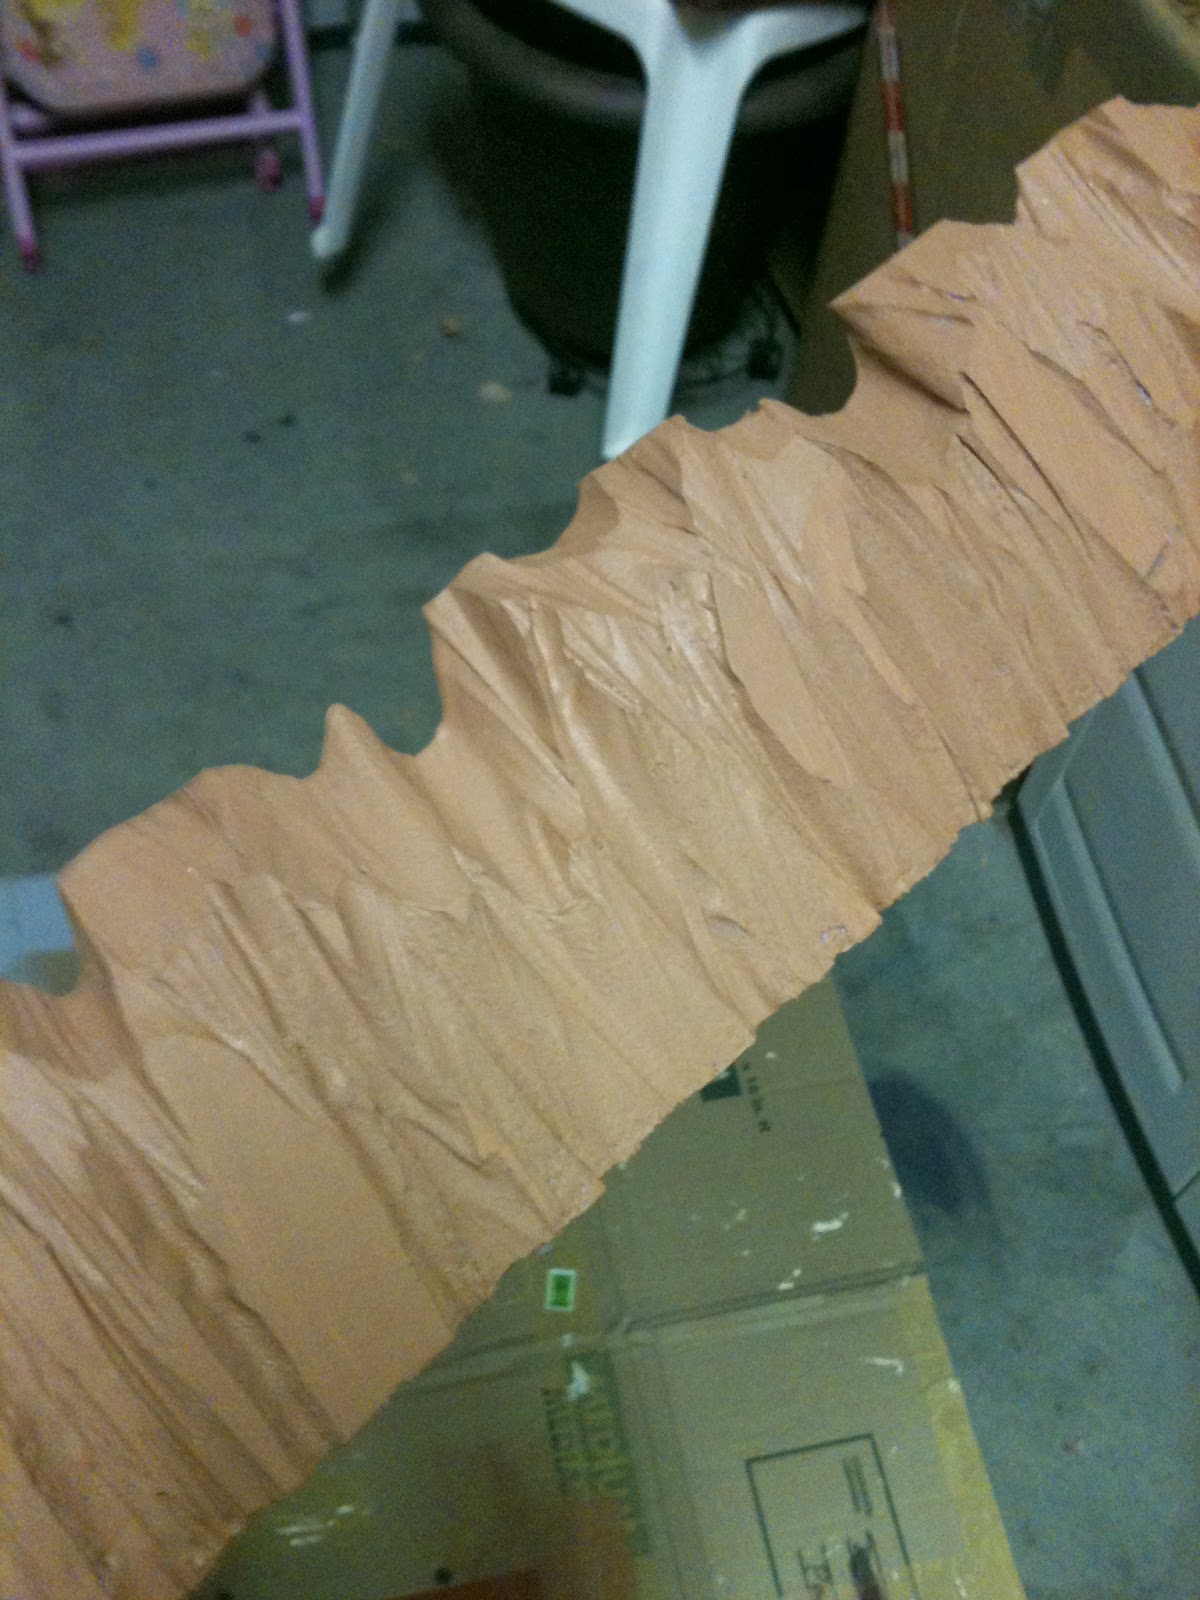
To give it a more a ruined look, I use ordinary household Spackle to create areas where debris and the sand have claimed the ruins
I added a large hill to break up the backdrop to help create the forced prospective for the background
Using a stock "sci fi background" image, I print it out, spray adhesive to a base and position 1" behind the hill
Time to paint! The base is Calient Brown, the ruins Deep Space. I left the Spackle portions unpainted for now
All of the Spackle areas are painted with Airy Tan. I then dry brush all areas to create the desert look and highlight the ruins
I added Iron ore flock (basically a crimson medium ballast) to add some more color balance & give it a more desert look. The client had replaced the tradition green rods in the Gauss weapons with red rods, so this was a great way to tie it all together

The Forced Perspective

This is old technique that gamers and movie makers have been using for years. I have looking for an opportunity to try this out in terrain for a while since my initial experimentation and I wanted to share.

The concept is simple: your brain and eyes have been trained to see things a certain way. Objects far away are smaller than objects up close within the same frame.

Gamers have been doing this forever. We paint the recesses of our models darker than the base coat & highlight the upper edges to make a 0.5mm edge seem like epic forged armor.

Movie makers have done the same and you make not even have realized it. Make in the 1930's, model makers (how cool was that job?) would create objects in exaggerated scale to show sizes that look out of this world. Some examples that are probably in your DVD collection:
  • Godzilla is a guy in a rubber suit. The city of Tokyo he is trashing is a bunch of scale models. The scenes with screaming people running for their lives is actual footage. The original background was cut out (by hand) and the film was superimposed on the footage of the guy in the rubber suit, giving the illusion full sized people are being chased by a giant monster..
  • The opening scene to Bladerunner (the most awesome terrain scene ever) is a brass etch model filmed by a camera on a crane arm
  • Don't be fooled by the hi tech wizardry of green screening: the concept is the same only you don't need to hand cut the film anymore. And you can use Photoshop to erase wires that are holding up flying actors
  • Many film sets, especially in spaghetti westerns, the bottom floors of buildings are full size but the unused upper floors are only 75% of the actual size to make the building look taller. The same technique is used in the original George Reeves Superman show & on Main Street USA at Disney
  • Model Train guys use different scale models to make backgrounds seem farther away. Lets look at that in depth

The basic concept starts with breaking your scene into segments. We will start from front to back:
  • The Foreground - This where the action is. This your full scale model and should have the maximum detail
  • Partials - this is the first layer of your background. This should be full scale & still have as much detail as your foreground. The trick is that these are not full sized models. Instead, the look great from the front but when you look from the size, you will see the object is only a fraction of the depth.
    •  In the movies, prop makers will build a full size house front, but the house will only go back 3 feet. Clever window dressings and keeping the door closed keeps the illusion alive.
    •  In modern movie making, the windows and doors are replaced with green screens so movie footage can be added to the scene later
    • For example, your favorite starship commander is not looking out his view screen at a space battle. He is staring at a green screen with a taped X so he knows where his eyes should be focused.
  • Flats - this layer is the critical layer for the execution of the effect. The objects in this layer should be 75% the size of the true scale counterparts. The detail here is minimal, maybe some raised sections but not nearly the level of your other elements
  • Background - the farthest most object, usually a wide landscape or picture. Items in the picture should be about 50% the size of your foreground items.
Using Kevin's display board, let us put this into use

First I cut Foamcore to size. Notice I spring for the black foam to help hide unsightly white edges, and I use a metal T Square to ensure straight lines
 
Attached Background Image using spray adhesive to ensure an even (ie no bubbles) application


Now I work on the flats. I cut out the portion of my original background image that the artist intended to be in front of the background. I cut the Foamcore to match the shape of the image

Attach image via Spray Adhesive

Even upside down (damn camera phone) the illusion that the hills & shrubs are in front of the background hills


As you can see, it is a illusion. The block of wood holding the Flat to the Backdrop is only 3/4" thick

Backdrop with Flats. The key is getting the spacing between Flats & Backdrop is essential. Too close, not effect. Too far, looks cartoony. Most recommendations is 1/2" to and 1"

Now we add the partials. In this case, I used dark colored hills that are 2" tall. The color creates contrast between the background, flats, and foreground. The 2" height is essential to gauge a size relationship between the models on the foreground & background elements


As you can see from these angles, the illusion is only 3" deep, but from the front it seems to stretch the view into the far distance

Finished illusion

Try this on your display board or on your gameboard's short edge. I did this where the short edge butt up against the wall of my basement

Hope you enjoyed and please comment below