The 11th Company 40K Podcast

Welcome to the 11th Company BLOG. The 11th Company is a Warhammer 40K podcast dedicated to players, strategies, and tactics.

You can download our episodes at the website, from ITunes, several podcast sites, or connect directly to the RSS Feed. We try to release a new Episode every Monday Night. Check it out!

Forums: http://the11thcompany.freeforums.org

PODCAST WEBSITE: http://www.tangtwo.com/11thcompany

PODCAST RSS FEED: http://www.tangtwo.com/11thcompany/podcasts/the11thcompany.xml

Podcast Archive: http://the11thcompany.libsyn.com/webpage


Search This Blog

Wednesday, May 4, 2011

An Alternate CSM List Part 4


Advancing up the Board

Last time, I discussed how one goes about deploying a rhino rush so that it does its best to not get blown off the table should the opponent have first turn. Before that, I also discussed the types of units and choices that can go into the alternate Chaos list. This article is going to further expand on the idea, providing some elements of key tactics that must be mastered in order for this list to be successful. The first key tactic is Advancing on the enemy. The second is Board Control.

A rhino rush is effective once you close the gap with the enemy. Ideally, if you get first turn, you’ll have closed the distance with only having to suffer one round of enemy shooting. If you have to go second, you will most likely need to weather two rounds of shooting. Either way, you need to master the methods of advancing across the board without getting shot to pieces.

Before I start discussing critical tactics for advancing, let’s first discuss just what an advance attempts to accomplish and how. The idea with this kind of Rhino rush list is to get your guns within range of the enemy where they are most effective, usually within 12 inches. Believe it or not, one full movement off your deployment line (or close to it) is usually enough to get right in that sweet spot. Why?

First, let’s look at the “no man’s land” for each of the type of deployments. The “no man’s land” is the area of the board that exists between your opponent’s allowed deployment zone and yours. For example, in a standard Pitched Battle, deployment zones are defined as the space that is 12 inches in from either long table edge. The “no man’s land” then is the 24 inches of space between those two deployment zones.

In Spearhead, that no man’s land is basically 24 inches as well, but it could be slightly shorter or longer if your opponent deploys in the corner. For Dawn of War, the “no man’s land” is very large, up to 48 inches (the entire board) because you have to roll on the board edge. This is actually mitigated though because the first round is night fight and will likely result in you getting the first 12 inches relatively safely. Thus, this becomes a lot more like Pitched Battle.

Now, the enemy can always choose to deploy “toes on the table edge”, or basically trying to push his entire army as close to his table edge as it can get. This may create more space between you and the enemy, and this type of tactic, depending on the army they are running and their overall army footprint, may thusly require the second turn of movement to close the distance.

Otherwise, back to the point I was making about it really only taking one turn. Here’s why! Assuming a pitched battle scenario, you will drive forward off the deployment line (or close to it), 12 inches. You have covered 12 of the 24 inches of “no man’s land”. From there, if you assume that your ride is destroyed, your troopers will simply move forward 6 inches next turn, and with their 12 inch range, still be able to overlap well into the enemy’s deployment zone. PEW PEW!


The same basically holds true for Spearhead. Although, of course, it’s best if you get 2 turns of movement where possible. This is also true of Dawn of War.

All of that being said, you don’t need to necessarily get the full distance in a Rhino. Indeed, this list wouldn’t work at all if that were the case because the enemy will definitely be wanting to kill your Rhinos to stop your advance. This will especially be true where it might even take a dreaded 3 Turns of movement to close the gap. Once I get into the tactics of Board Control (next article), I’ll explain how you work around those problems.

For now, though, let’s talk about how you properly advance with Rhinos to protect yourself using the Rhino Shuffle!

The Rhino Shuffle is basically applying the same concepts that we discussed in the last article about providing cover for yourself but doing it while you move your Rhinos. This is very much an art because the goal is to move your Rhinos as self-protecting blocks, and the artistry and geometry behind moving these vehicles to get them into the right spots requires a great deal of vision.

The bottom line is, though, that the lead Rhinos either should be getting cover from Terrain or be blowing smoke. Other Rhinos will be getting their cover from the lead vehicles.

Here’s an example (in very bad art form!).


When you leave your deployment, you start lining up, using lead Rhinos to provide cover for other Rhinos. Those in the lead start blowing smoke. We don’t blow smoke on the entire lot, though. The reason is that on the next turn of movement, we will use though who have not blown smoke yet to “swap” or “shuffle” up front to blow their smoke. Thus the Rhino shuffle. The next image shows where the second turn of movement goes. Notice how the ones that did not blow smoke in the previous image will be moving up front while the other fall into line behind them.

The overall key, you only need at most, 2 turns of movement to get anywhere. Usually, 1 turn actually suffices.


This is great providing the enemy doesn’t kill any Rhinos. What happens if they do? Easy, you walk up the passengers, use your own Rhinos to provide cover for them, and start the PEW PEW. Here’s the same as above except this time assuming 2 Rhinos bite it to enemy shooting.


We don’t worry about Rhinos that die. Why? Because a dead Rhino just becomes cover for our own troops. Once the Rhinos have gotten the troops where they need to be, we start using Board Control which is the art of blocking, getting cover, providing bunkers, etc. for our troops. From there, we unload with all those wonderful assault weapons we purchased. We use our own Rhinos to make it difficult for the enemy to advance, and we try to do as much damage as we can.

The next article will get a lot more into Board Control which are the extremely important tactics for making this work.

Lastly, keep in mind that even if you lose Rhinos on your deployment line, move + run your disembarked troops behind the Rhino’s as they advance. They’ll get to the fight either way! This is why it’s important to have a lot of Rhinos to make this work.

Lastly, I leave you with another list concept. This is just a fun idea to combine an Assault Khorne Element along with all the PEW PEW. We are basically substituting Plasma shots for Assault Units. The core concepts are still in place. 9 Rhinos. Overkill PEW PEW. Mostly MSU. This does slightly violate the rule about cheap units because Berserkers are spendy.

HQ:

Kharn - 160

Elites:

5 x Chosen + 4 x Melta w/ Rhino + Combi-Melta - 175

5 x Chosen + 4 x Melta w/ Rhino + Combi-Melta - 175

5 x Chosen + 4 x Melta w/ Rhino + Combi-Melta - 175

Troops:

6 x Khorne Berserkers + Skull Champ + PFist + Icon w/ Rhino + Combi-Melta - 237

6 x Khorne Berserkers + Skull Champ + PFist + Icon w/ Rhino + Combi-Melta - 237

6 x Khorne Berserkers + Skull Champ + PFist + Icon w/ Rhino - 227

5 x Summoned Demons - 65

5 x Summoned Demons - 65

Heavy:

5 x Havocs + 4 x Melta w/ Rhino + Combi-Melta - 160

5 x Havocs + 4 x Melta w/ Rhino + Combi-Melta - 160

5 x Havocs + 4 x Melta w/ Rhino + Combi-Melta - 160
Tuesday, May 3, 2011

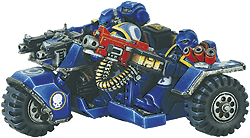
The Case for Attack Bikes over Land Speeders


Does it really matter? No. It doesn’t. More or less, it comes down to play style. However, that choice is definable.

Since our podcast clearly supports using Attack Bikes where possible in the fast choice over Land Speeders, since most people I think don’t agree with that, and since we’ve never really covered it in depth, here it goes. Do I really care that much? Not really. They are both basically the same and basically fill the same role. However, I think what is lost on most people is exactly why Attack Bikes can be more effective than Land Speeders in many cases.

To keep the article small, I’m going to simply list all the places where Attack Bikes are better than Land Speeders. There is an equally long list of reasons why Land Speeders are better than Attack Bikes. So, let’s keep that in mind even though I am clearly writing an article that is meant to provide a case for Attack Bikes.

  • Attack Bikes are cheaper for a similar weapon load out. 40 Points for a Heavy Bolter versus 50 on the Land Speeder. 50 Points for a Multi-Melta versus 60 on a Land Speeder. I also say a “similar” weapon load out because……
  • Attack Bikes have a Twin-Linked Bolter which people always forget about. A rapid firing Attack Bike with a Heavy Bolter puts out 3 S 5 shots and 2 Twin-Linked S 4 shots. A good bit more pew pew for also being 10 points cheaper.
  • I concede that an Attack Bike does not have nearly the amount of options that a Land Speeder does (Typhoons, Heavy Flamers, Assault Cannons). However, you spend points for those options. They aren’t free, making the point disparity even greater between the two. Also, I concede that an Attack Bike cannot assume a “duality” role of Anti-Tank and Anti-Infantry…… or can it?
  • But wait, an Attack Bike can do something a Land Speeder can’t do. Assault! Say what???? Yes, that’s right, it can assault. Let me pose this question to you. How many turns does it take for a Land Speeder squadron to disable a 5 man long fang squad? Depends on guns, loadout, dice roll, zzzZZZzzz. How many turns does it take a 3 man Attack Bike squad to disable a 5 man squad of Long Fangs? 2. One to turbo-boost over there and another to assault them. Good luck to them fighting their way out of 6 T5 wounds that have just as many attacks per round as they do.
  • An Attack Bike can multi-melta a transport and assault what’s inside. What’s scarier to a Veteran laden Chimera, a Land Speeder blowing it up or an Attack Bike blowing it up and assaulting the Veterans inside? How’s that for a little duality?
  • Attack Bikes get a 3+ cover save when Turbo-boosting. A Land Speeder gets a 4+.
  • Land Speeders have a very visible profile being so high up. Attack Bikes have a low profile being low to the ground. What does that mean? It’s easier for Attack Bikes to find LoS blocking terrain to hide behind as they advance or even hide behind their own Rhinos. A Land Speeder? Not so much! It’s visible almost all the time and just begging for anti-tank fire.
  • Attack Bikes can choose to fall back if they get shot at. Interesting, but it’s useful to be able to get out of dodge after melta-whipping a tank. What’s a Land Speeder do?
  • Attack Bikes are much more resilient versus small arms fire. What you ask? How is that possible when the Land Speeder is a vehicle???.......
  • Because Attack Bikes can’t be shaken/stunned, immobilized, or have their guns taken away. Here’s a simpler way to think about it. What are the odds that a bolter round can stop a Land Speeder? (0.66 * 0.167) = 11%. This is because any glancing hit stops it. What are the odds that an Attack Bike gets stopped? 0% because it has two wounds. J Okay, not fair I know! How about a rapid firing bolter? 21% chance to disable the Land Speeder. 14% chance versus Attack Bike to kill it.
  • Attack Bikes are more vulnerable versus Missiles and Lascannons. Why? Because they get doubled out and it’s AP 3 or better. However, consider this…. Attack Bikes can find cover almost anywhere. Land Speeders float in the air with a huge target on them. Since most people want their Land Speeders within Flamer or Multi-Melta range, they aren’t usually hiding behind something. Attack Bikes can hide behind a blade of grass. When you think about it this way, an Attack Bike has a 27.7% chance to die with cover of 4+. A Land Speeder has a 29.5% chance to be penetrated without cover and have its gun removed, immobilized, or destroyed by a Missle (Lascannon is worse!). To die, granted it’s about a 14.5% chance. However, a Land Speeder with no gun is dead and an immobilized one generally is to. Not always! But usually. Land Speeders in a Squadron die much easier. (22% to die versus missile, 27% versus LasCannon). So, although they are “more survivable”, it’s useful to know just “how much more”.
  • Also, in terms of survivability, remember that a flat out moving Land Speeder also dies on an immobilized result. Ouch!
  • And last but not least, guess who is more survivable versus all these weapons, Bolters, Heavy Bolters, Autocannons, Assault Cannons, Storm Bolters, Grenade Launchers, Psybolt ammo, Multi-Lasers, Heavy Flamers, almost every gun in the Nid codex… basically everything except Missile Launchers, Lascannons, and Meltas (or their xeno equivalents?).
  • Attack Bikes don’t get immobilized if they end in Area Terrain, they just take a wound on a 1.
  • Attack Bikes get cover from Area Terrain. Woot!
  • An Attack Bike can fire both of its guns and move 12.
  • And then assault afterwards!
  • An Attack Bike has a pimpin’ side car. A side car, people! When’s the last time you saw a Land Speeder in an Indiana Jones movie? That’s what I thought!

There’s probably more, but that’s a good start! Enjoy the food for thought and don’t take it too seriously.

Friday, April 29, 2011

An Alternate CSM List Part 3


So far, I’ve introduced an alternate list for CSM other than a Lash list and talked about its composition. I’ve also discussed how you can tailor the list in a lot of ways to make it your own with suggestions and rules to follow. The next things to discuss are the critical tactics behind making the list work. I can’t possibly tell you everything you need to know, but what I can offer are some of the most critical tactics that you will need to gain an understanding of in order to make the basic principle of the list work. The first tactic to discuss is deployment, possibly the most important thing to this list. This list will be worthless to you if you get second turn and are blown out of all your rhinos before you even get to move. To prevent this from happening, you need to master the ways of the making your own cover and your own LoS blocking terrain using your trusty Rhinos and available terrain.

1. Using your own Rhinos as Cover (Basic)

At the very basic, if you can’t find any terrain to hide behind, you can use your own Rhinos to provide cover. With just one Rhino and some cheap troops, you can actually provide cover for a significant portion of your entire force.


See that your troups provide cover for the front Rhino while it provides cover for those behind it. When you deploy, deploy as to protect yourself from enemy fire. Also, recognize that you can stack your vehicles for even more cover.


2. Use Available Terrain and Your Own Vehicles To Extend It

It's ideal if you can use available terrain to completely block Line of Sight (LoS) to your vehicles. If you can't do that, you can use available terrain to give yourself cover.


See how in that image the Rhino is extending the length of the already available terrain, gaining a cover save for itself, and at the same time, it is blocking LoS to the one behind it. The other Rhino is completely out of LoS, behind the terrain.

3. Use Angles to Block LoS

Remember that LoS is drawn from the models shooting. You get down to the model eye level and look to see what the model can see. Use that knowledge and angles to completely block LoS with one Rhino to another. It's difficult but possible. Don't let your opponent cheat you here either with saying that he can see stuff when we really can't. In this image, imagine the enemy is across the table and a little to the right. As he looks down the table at the front Rhino at a slight angle, the Rhinos directly behind are invisible to him. (Pro Tip: Make sure your opponent agrees the vehicles is out of LoS before you end deployment so he can't argue later or at least get the arguing out of the way now before anyone gets a suprise.)


4. Red Herrings

A red herring is part of a bait and switch. The idea is to tempt your opponent into shooting at something that he feels is important but you don't care so much about. This is something I like to use Demon Princes for. Find him some cover, but make sure he's still at least partially visible. Rhino's don't need cover if they are busy shooting at your Demon Prince.

5. Split Terrain Features and the Coveted 3+ Cover Save

First, you can use available terrain that is split to gain cover and still group up for moving forward. Use your imagination a little and visualize how you can make that happen.

Also, recognize that if you turn a Rhino sideways in your deployment, almost the entire other side of the table is going to be in his side arc. If the enemy is looking directly at you and your side is against LoS blocking terrain, all he can see is the front or rear. Now, he's shooting at an arc he's not in, and thus, you get a 3+ cover.


Next time, I will get into the next set of critical tactics. Those are the tactics you use to get across the board and into range to start raining down the pain.

As promised, here's another list just to show you flexibility. This one is at 1500 points.

HQ;

Kharn the Betrayer - 160

Summoned Greater Demon - 100

Elites:
5 x Chosen + 2 x Melta + 2 x Plasma - 185
Rhino + Combi-Melta

5 x Chosen + 2 x Melta + 2 x Plasma - 185
Rhino + Combi-Melta

Troops:
5 x CSM + Melta - 130
Rhino + Combi-Melta

5 x CSM + Melta - 130
Rhino + Combi-Melta

5 x CSM + Melta - 130
Rhino + Combi-Melta

5 x CSM + Melta - 130
Rhino + Combi-Melta

Heavy:
5 x Havocs + 2 x Melta + 2 x Plasma - 170
Rhino + Combi-Melta

5 x Havocs + 2 x Melta + 2 x Plasma - 170
Rhino + Combi-Melta

Wednesday, April 27, 2011

Alternate CSM List Part 2

Last time, I introduced an alternate, competitive list to the Lash list which basically amounts to a MSU rhino rush. This time, I'm going to explain the various aspects of the list and why the work. I'll also introduce the concept of the list. This is made even cool because this list, unlike a Lash list, is very customizable and can include some fluff elements while maintaining its basic effectiveness. (Granted, it will lose some effectiveness on certain choices made, but overall, if you follow the concepts, it will work).

Last time, I also made some key points that you follow when building this list. You need rhinos, of course, and lots of them. You need more transports than your opponent can reasonably kill in one turn. You need highly effective and lethal weapons in a shooting phase to deal as much overkill as possible. Plasma, melta, and flamers fit the bill depending on targets. You need to truly MSU, meaning that you can afford to lose units without losing the game. (This is more important than you know because most people think they are MSU when they are actually sitting on Pivots... I'll do a BLOG post on Pivots later or you can listen to one of our earlier podcasts where we discuss it). Also, if your units get assaulted by dedicated CC, you want to make sure you die quickly so you can spray that assault unit down with plasma, melta, and flamers in a nice, overkill package (see above).

So, here's the breakdown of the theory in the list so you can get an idea of how the concept is fleshed out. I'm going to break this down by force organization and give you an idea of the kinds of units that work. I will also explain what I think is the most efficient choice for each category. The idea is if you follow this advice and the rules above, you can construct your own version of this list to fit your play style. It's effective in many, many variants which is a big reason why I also like it better than the standard Lash list.

HQ:

For your HQ choice, you really want some that is cheap and effective. You don't want to overspend here because you need the points to pack in more MSU rhinos. If you eat up your points trying to get some scary HQ units, you won't be able to pull it off.

Most Efficient Choices:
  • Lash Sorceror - 125 points. He rides in a rhino and uses lash to drag units out of cover to get sprayed. Super effective.
  • Kharn the Betrayer - Cheaper HQ but can seriously dish out damage in an assault. You'll be close to the enemy anyways, and Kharn is a scary mofo.
Other Choices:
  • Winged Prince of Tzeentch/Nurgle - A little spendy for what we want, but this guy has synergy because he is a bullet magnet which protects your rhinos. A solid choice. Do not overspend here.
  • Chaos Lord - A mini-kharn. You could just give him a Plasma Pistol and call it a day for a super cheap option or kit him out a little for HtH. Honestly though, if you want HtH, go with Kharn.
Elites:

For the elite slot, you will follow the basic rules above. Cheap, MSU, lots of pew pew, folds like a wet paper bag in combat. This is an easy category because there are only 2 choices to make.

Most Efficient Choice:
  • Chosen in a Rhino w/ some combination of flamers, meltas, and plasma guns. The fit all categories for a good points expenditure. They can carry a whopping 5 assault weapons in a single squad!
Other Choice:
  • 3-4 Terminators w/ Combi-Weapons dropping in. The only reason why these guys are truly an option is that they will arrive in Turn 2 at the same time as your army gets close to add more fuel to the fire. I really recommend Chosen though as Terminators are not reliable and don't add a Rhino.
Troops:

Here is where the true customization comes in. ALL of your troop choices available to you fit the bill above so long as you kit them out okay. Some are more efficient than others, but really, they all work in some capacity or another. Remember, the idea is to be so cheap as to be almost throw-away. The point is to get kill and get your points before you die. Also, everything adds a Rhino.

Most Efficient Choices:
  • 5 x Plague Marines w/ 2 x assault weapons + rhino. Tough, relatively cheap, and have 2 assault weapons in a 5 man squad. No champion. No powerfist. Just cheap, and assault weapons. Only downside here is that sometimes Plague Marines don't fold in combat as easily, but really, this can be a tactical advantage is some cases as well.
  • 5 x Chaos Space Marine + 1 x assault weapon + rhino. Alternately, drop 1 CSM, add a Champion with a Plasma Pistol or Combi-weapon. Super cheap. You can spam these guys, and they fit every requirement listed above. For fluff players, this is also great because you get to actually use your CSMs!
Other Choices:
  • Medium sized Berserkers Squads + rhino. Decent with up to 3 plasma pistols or just as an assault unit. A little spendy for what we want, but if you want to fight some, they work just the same.
  • 4 x TKSons + Sorc w/ Wind of Chaos + rhino. These guys will bring the pain leaping out of a rhino with WoC and AP 3 bolters. You can decimate Marines with this combo. It's a little spendy, but it works.
  • 4 x Noise Marines + Champ w/ Doom Sire + PW + rhino. Okay, these guys don't have a assault weapon capable of tank killing. But, Doom Siren + I5 attacks is brutal. Use your other units to pop and kill with these guys. A little spendy, but they still work.
Fast

No one can make the Chaos fast choices any good. Sorry :/ Best you will get out of fast is minimal Raptor squads with assault weapons. This can work if you run then behind your rhinos or deep strike in. They add no rhino though which is needed.

Heavy:

In Heavy, you need to be following the rules above once again. It's critical to remember when looking at this list that if you don't have at least 9 rhinos on the board at 2000 points, you need to pick them up here. As tempted as you might be to take Predators or Oblits, keep in mind that Rhinos are necessary for this list to work.

Most Efficient Choice:
  • 5 x Havocs + combination of assault weapons x 4 + rhino. Just like Chosen, Havocs fit the bill and do it cheaper! They add rhinos, an obscene amount of assault weapons, and efficient death dealing.
Other Choices:
  • Predators. You can take predators as a gun battery for this list to work, but you need to make sure you already took enough Rhinos. If you maxed rhinos in Troops and Elites, you should be good to switch.
  • Obliterators. Just like predators, make sure you already have enough Rhinos. Then, these guys become a good choice.

Next time, I will talk about the various tactics you absolutely must master to make this work. We'll start with the most important phase of the game, movement, and expand from there. I will now finish up this article as promised with an example list.

This list goes out to anyone who just absolutely wants to run a Fabius Bile CSM list. It's definitely not the most efficient way to run this list, but it's still not bad.

HQ:
Fabius Bile - 160

Elites:
5 x Chosen w/ 3 x Melta + 2 x Flamers - 175
Rhino + Combi-Melta

5 x Chosen w/ 3 x Melta + 2 x Flamers - 175
Rhino + Combi-Melta

5 x Chosen w/ 2 x Melta + 3 x Plasma - 200
Rhino + Combi-Melta

Troops:
4 x CSM + Melta + Enhanced Warriors - 175
1 x Aspiring Champ + Power Weapon
Rhino + Combi-Melta

4 x CSM + Melta + Enhanced Warriors - 175
1 x Aspiring Champ + Power Weapon
Rhino + Combi-Melta

4 x CSM + Melta + Enhanced Warriors - 175
1 x Aspiring Champ + Power Weapon
Rhino + Combi-Melta

5 x CSM + Melta + Enhanced Warriors - 145
Rhino + Combi-Melta

5 x CSM + Plasma + Enhanced Warriors 150
Rhino + Combi-Melta

Heavy:
5 x Havocs + 2 x Melta + 2 x Plasma - 170
Rhino + Combi-Melta

Obliterators x 2 - 150

Obliterators x 2 - 150

Oblits just seem too make sense with Bile at the helm wince he would seem to be responsible for all the sicko mods that Oblits have to morph guns.

Tuesday, April 26, 2011

Alternate CSM List Part 1


Tired of Lash lists?

Frankly, I'm not a real big fan of the old Lash of Submission lists. It's a little to elite for my tastes. It also relies on some pivots, namely Obliterators and of course, Lash Princes. If you happen to run into opponents that have good answers to these two models, your Lash list can fall apart fairly quickly. Also, if you have a bad round of dice rolls, Oblits that can't hit, a few failed armor saves, the list can belly up pretty quick. It still works though, of course, as shown by the guys who still win with Lash lists at tournaments.

Codex CSM is far from a mono-build though. In my opinion, one of the things that CSM do best is the rhino rush. I know, you are thinking, "Rhino Rush?? Seriously, WTF? Is this 4th ed?" Actually, the Rhino Rush works better in 5th ed. than it ever did in 4th ed. thanks to the increased survivability of vehicles and cover saves, but yes, a rhino rush.

On top of being a really good rhino rushing army, CSM is also exceptional at an MSU style rhino rushing army. This is for a few reasons not the least of which is the ability to carry assault weapons in extremely cheap choices with high returns. Space Marines make up for this with the Razorback. CSM do it by shoving 4 melta guns into a Havoc squad.

I've posted this list a bunch since we started the podcast, and generally, the feedback I get is, "yeah... this list doesn't look like it would work to me". This isn't a question of "does this work?" because I already know it does. I played the list or variants on it for years. However, what makes this list so much more interesting to me is all the advanced tactics that go into making it work.

My goal is to, by the end of this series, convince you that a list similar to the following actually works well. The overall scope of it covers why the movement phase is the most powerful phase of the game, how MSU is supposed to work, changing your tactics to counter your opponent, and vehicle overloading.

The following is an example of the list concept. I'll post a new variant in each article in the series just to show you have flexible you can really make it. To kick us off with the series, I'm going to discuss the "core" behind the list.

Here are the principles behind the core:

1) More vehicles than your opponent can reasonably destroy/disable in a turn of long range shooting. Factor in cover saves which we will talk about is a critical tactic.

2) Overkill in the shooting phase. Wherever you go, you want to make sure the job gets done when you get there. There won't be any second chances.

3) Units which will collapse in assault to dedicated assault units. Why? See #2!

4) MSU to the core; otherwise known as you really, really, I mean really, as is not just kind of but actually, do not care if any one unit gets killed.

Okay, here's a list example.

HQ:
Chaos Sorceror + Lash of Submission - 125

Elites:
5 x Chosen + 2 x Melta + 2 x Plasma - 185
Rhino + Combi-Melta

5 x Chosen + 2 x Melta + 2 x Plasma - 185
Rhino + Combi-Melta

5 x Chosen + 2 x Melta + 2 x Plasma - 185
Rhino + Combi-Melta

Troops:
5 x CSM + Melta - 130
Rhino + Combi-Melta

5 x CSM + Melta - 130
Rhino + Combi-Melta

5 x CSM + Melta - 130
Rhino + Combi-Melta

5 x CSM + Melta - 130
Rhino + Combi-Melta

8 x Khorne Berserkers + Plasma Pistol - 274
Skull Champion + PFist
Rhion + Combi-Melta

Heavy:
5 x Havocs + 2 x Melta + 2 x Plasma - 170
Rhino + Combi-Melta

5 x Havocs + 2 x Melta + 2 x Plasma - 170
Rhino + Combi-Melta

5 x Havocs + 2 x Melta + 2 x Plasma - 170
Rhino + Combi-Melta

Stats:
11 x Rhinos
11 x Combi-Meltas
16 x Melta Guns
12 x Plasma Guns
1 x Plasma Pistol

More vehicles than your opponent can reasonable kill in one turn? Check!

Overkill in the shooting phase? Check!

No one unit is pivotal in the list? Check!

Units will fold like wet paper bag against dedicated assault units? Check!

Why are the Khorne Berskers there???!? - Good question. The answer is, for fun. :)

Here's what I want you to take away from this list at the moment:

A) I could mix and match weapons all day long. Take some flamers, a few more plasma guns, more melta. Whatever.

B) I could mix and match troop choices all day long. Plague Marine are great. Berserkers are great. Even the plain jane CSM is great. Noise Marines, TKSons, they all work in with this list concept and each bring a different flavor.

C) Remember that Chosen can outflank.

In the next article, I'll break down each unit and how it works in a nutshell.

Thursday, April 21, 2011

Are you Blocking Yet?


One of the most common thoughts that runs across my head when having discussions about army this, tactic that, when he does this I'll do this, when I face army A I always get nailed by point B, is...

Where's the Blocking at?

Most of life's little problems in 40K can be solved by blocking. What is blocking? The simple definition is using your own models to deny the ability of your opponent to move or assault.

We've talked about this several times on the podcast, but I still feel like the message doesn't get driven home enough. Blocking wins games. Here's some examples.

"Circle the Wagons" - Circling the wagons is using your transport vehicles to surround your forces to prevent the enemy from assaulting you. How does this work? Your transports drive > 7 inches in a fluid fashion that also prevents the enemy from moving past them during the movement and either doesn't provide enough room or your own models are to far back to be assaulted during the assault. Your opponent then has to assault the vehicles. Awesome. He needs 6's to hit. Then, even if he does kill it, it might be wrecked forcing him to move through dangerous/difficult next turn and even highly likely needing to roll difficult/dangerous to now assault, which means he needs grenades to go first. Not to mention, this buys an entire turn of shooting.

"Bubble Wrapping" - Using your own models just like above to prevent an enemy from getting close to you. Surround your important bits with your less important bits. Make the opponent assault through another unit which provides you another entire turn of shooting or sets up the counter-assault.

"Straight Blocking" - Using either your own troops or vehicles to simple deny forward movement. Be this driving up a cheap rhino to clog the path of an oncoming Land Raider or using a line of cheap troops to prevent an opponent from getting to close to an objective. He has to drive around, walk around, or assault through. Make it a royal pain.

"Denial" - Most effectively used and described when dealing with reserves. The idea of board denial is to literally provide no room for the opponent to move to. You can use this to control where an opponent is allowed to deep strike, control where an opponent can actually outflank to, and so on.

"Clogging" - Just like in the movie 300. Find a small space and clog it with bodies, vehicles, and loads of other models. Make sure you line them up so that each provides a layer of blocking like an onion. How many turns will it take him to get through all of that? Way more than he probably has to get to that objective you are trying to protect. Create your own choke points with your vehicles.

"Boneyards" - Use your own vehicles to create boneyards on the board. This is one of my personal favs and most often not understood by opponents until its to late. Let's say I have a really nasty hammer unit cramping my style like Terminators for example. Whatever direction they are coming from, I'll start driving my empty transports that one. Basically, I'm inviting him to shoot and kill those transports, and if he doesn't, I'll use them to block his hammer unit. Even when they do die, now a huge board space is mired with difficult/dangerous which could potentially slow that unit down to the point of uselessness for the rest of the game.

"Board Denial B" - Spread your own units out to prevent jump troops from having a place to land, to prevent flat out moving skimmers from having a place to go , to force your opponent to move in a certain direction.

Remember, the movement phase is generally the most powerful phase of the game for strong armies. The reason is that movement is the only thing that can really be controlled with certainty. Use it.

I don't want to hear anymore about how stuff came charging out of a Web Way and assaulted half your army. Block for your army. Prevent the assault.

No more about your Tyranid Monstrous Creatures get assaulted and killed by Grey Knights. Block with Termagaunts. Make them fight through 5 layers of the little suckers. They'll never get to you.

No more about Wolf Scouts coming on behind you. You know they are coming. Deny the board. Funnel them into a death trap where they might get their hands on something non-important and end up dead to a firing line.

Block. Love it.

Tuesday, April 19, 2011

GK Range Issues


Examining Grey Knight lists that I want to run as well as others I have seen over the past few weeks has brought up a tactical flaw in a lot of armies that I really think is worth a bit of discussion. This has to do with ranged capability within Grey Knight heavy armies.

One of the things that I want to do and what I see most people want to do with Grey Knight heavy armies is to rely on Storm Bolters and Psycanons to put out loads of bullets. The theory then is to take board center or something similar by turn 2 and start laying down a hail of shots. From here, rely on slightly above average CC capability and camp objectives.

Most lists I have seen are already admitting, as I myself have discovered, that this theory isn't really going to work once it hits tabletop because you absolutely need some long range shooting capacity for the above strategy to reach fruition.

Why?

Let's assume that you are running a a GK Heavy list consisting of a lot of MSU elements like Purifiers/Strike Squads with Psycannons, maybe some Psybacks (heavy bolter + psybolt razorbacks), Rhinos, a Librarian, who knows. In a layout like this, your average range is 24 inches, with the Psybacks giving you a decent 40 inch reach (movement + 36 inch range) with some S6 shots.

Now, provided you can take board center as you would like, the range becomes a bit less of an issue because you can cover a significant amount of the board from there with your 24 inch range. However, you have to admit that you can't cover the WHOLE board from here. Indeed, the corners, the places where people like to refuse flank or castle, will only be reached at best by your Psybacks.

This may not be an issue against a lot of armies, but against some armies it will certainly be a problem. There are some very common, very lethal, and very interesting choices that can go in those "corners", which I will now refer to as dead zones.

Long fangs, Leman Russes, Manticores, other AP2/AP3 artillery, Predators, Obliterators, and the list goes on will happily sit in those dead zones and let you have it without fear of return fire.

This creates an obvious conundrum. The above list doesn't have any outflanking, honest deep strike potential, or really effective long range shooting. So, what are you going to do? You can attempt to ignore those units in the dead zones, but this leads to fundamental issue #1:

Issue #1: Grey Knights are just to expensive to think that you can "ignore" enemy fire power. You can't "outlast" it because you don't have enough models.

Okay, no sweat, you'll just move closer to get into range of these dead zones. This is, of course, logical, but as play testing has shown me, not always feasible. Indeed, not by a long shot. The thing is, lots of other armies are quite capable of meeting you in board center, and indeed, WANT to meet you there.

Here's a couple of examples. Let's examine a quick Wolf Rhino Rush maybe with a Thunder Lord backed up by Long Fangs. So, the Long Fangs go into the dead zones to shoot you the entire game. In the meantime, you get locked into a struggle for board center by the rest of his army which is bulky and not exactly afraid of your lack of AP2/Ap3 shots. You might eventually kill them all off, but it will take many turns to "hail of bullets" that away. In the meantime, those Long Fangs are having a field day back there taking our your razorbacks, your troops if they must, and basically just uncontested aiding their assault.

How about Demons? Sounds dumb right? Not so much if they have some Soul Grinders or other semi-shooty elements in their list. The shooty hangs out in the dead zones while the rest of the army gladly will duke it out with you board center.

How about Deathwing Assaults? Those Land Speeders or whatever other support element he took hang out in the dead zones while all those Terminators tie you up in board center for a very long, protracted fight.

Indeed, the more you think about it, the more you will probably realize that just taking board center is by no means a "guarantee".

Issue #2: Assuming that you will get into board center or be able to hold board center is not a safe assumption. Lots of other armies can make a mess of it as they like board center or are more capable of taking it than you are. They can also easily push you back into your deployment.

Solution? Well, we modify our list to add some Psy-Dreads or maybe some Lasbacks? Indeed, this will let you fish those units out of dead zones provided you can get the shots off and don't get stun-locked. Without warbands, there is no long range shooting in the entire dex that isn't found on either a vehicle or a monstrous creature. The problem here can be that you can be "stun locked" off your long range shooting if you only include just a few vehicles. It's AWESOME that you can't be shaken/stunned very easily as GKs, but you can have your guns blown off, be immobilized, or just flat destroyed all of which work.

Issue #3: Can you bring "ENOUGH" long range shooting to get the job done without losing the rest of your army's ability to "take board center" and not just get "disabled"?

And lastly, more importantly....

Issue #4: Not all deployments are pitched battle. In Spearhead, the "dead zone" is guaranteed to be there unless you can DS or outflank.

I'm not making a point towards any direction other than just to add food for thought for would-be Grey Knight generals out there. I have found, thus far, that these are the weaknesses to overcome in the book.

Monday, April 18, 2011

Storm Bolter Statistics


I keep running into this nugget all over the place, and basically I wanted to make sure folks have a little perspective on this:

What's the difference between a normal storm bolter and one with psy-bolts added?

Storm Bolter: % chance to kill a space marine:
0.666 (to hit) * 0.5 (to wound) * 0.333 (chance to fail save) = 0.111

Storm Bolter w/ Psybolts: % chance to kill a space marine
0.666 (to hit) * 0.666 ( to wound) * 0.333 (chance to fail save) = 0.15

Difference: 3.9%

So, as you can already tell, neither load out is exactly frightening. Granted, attaching psy bolts increases the effective killing power versus marines of a storm bolter by about 35%, let's put that in perspective.

Any given Storm Bolter ( 2 shots ) has a 19.2% chance to kill at least one Space Marine.

Any given Storm Bolter w/ Psybolts ( 2 shots ) has a 27.8% chance to kill at least one Space Marine.

So, here's some perspective. How many "less" Storm Bolters will psy-storm bolters require to reliably kill the same amount of normal Storm Bolters?

Well, we need to define "reliable". Let's say that reliable = 75% chance of success. This means that 3 out of every 4 times you try it, it works.

So, here's the rephrase. How many Storm Bolters and Psy-Storm Bolters will each respectively take to reliably (75% chance) to kill at least one marine?

To figure this out, you calculate your odds of killing nothing and subtract that from one. (Dirty statistics will tell you it takes 9 shots). The actual answer is approximately 13 shots to reliably kill one Space Marine, that's 6 and a half Grey Knights firing just to reliably take down one dude. (Have some perspective here as to why I'm not a huge fan of the supposed Grey Knight Pew Pew tactic from Storm Bolters.)

For a Psy-Storm Bolter? The answer is 9 shots. So, that's 4 and a half Grey Knights firing to reliably take down one dude.

My overall point? Clearly, neither of these load outs is all that effective at killing marines.

P.S. Don't even bother shooting at something with FnP. :)

Friday, April 1, 2011